
1. Kirish
This manual provides detailed instructions for the safe and proper installation, operation, and maintenance of your USX STAR SAS202 Ceiling TV Mount. Please read this manual thoroughly before installation and retain it for future reference. This mount is designed to securely hold televisions ranging from 26 to 65 inches, with a maximum weight capacity of 110 lbs, and VESA patterns from 50x50mm to 400x400mm.
2. Xavfsizlik ma'lumotlari
- OGOHLANTIRISH: Do not mount this product on drywall alone. It must be mounted to a solid structural support such as wood studs, concrete, or brick.
- Ensure the mounting surface can safely support the combined weight of the mount and your television.
- Always use the provided hardware. If you are unsure about any part of the installation, consult a qualified professional.
- O'rnatish vaqtida bolalar va uy hayvonlarini uzoqroq tuting.
- Maksimal og'irlik sig'imi 110 funtdan (50 kg) oshmang.
- Verify your TV's VESA pattern and screen size are compatible with the mount before proceeding.
3. Paket tarkibi
Please check to ensure all components are present and undamaged. If any parts are missing or defective, contact customer support immediately.
- Shift plitasining yig'ilishi
- Sozlanishi qutb
- TV Bracket Plate
- Vertical TV Brackets (2x)
- Mounting Hardware Kit (screws, washers, spacers, anchors for various ceiling types)
- Allen Key
4. Texnik shartlar
| Xususiyat | Spetsifikatsiya |
|---|---|
| Model raqami | SAS202 |
| Ekran o'lchamining mosligi | 26" dan 65" gacha |
| Og'irlik sig'imi | 110 funtgacha (50 kg) |
| VESA muvofiqligi | Min 50x50mm, Max 400x400mm |
| Balandlikni sozlash | 21.14" to 29.02" (5 height settings) |
| Nishab burchagi | Up to 15 degrees down |
| Burilish burchagi | 360 degrees (full rotation) |
| Shiftni aylantirish | Up to 90 degrees for sloped ceilings |
| Material | Metall |
| Rang | Qora |
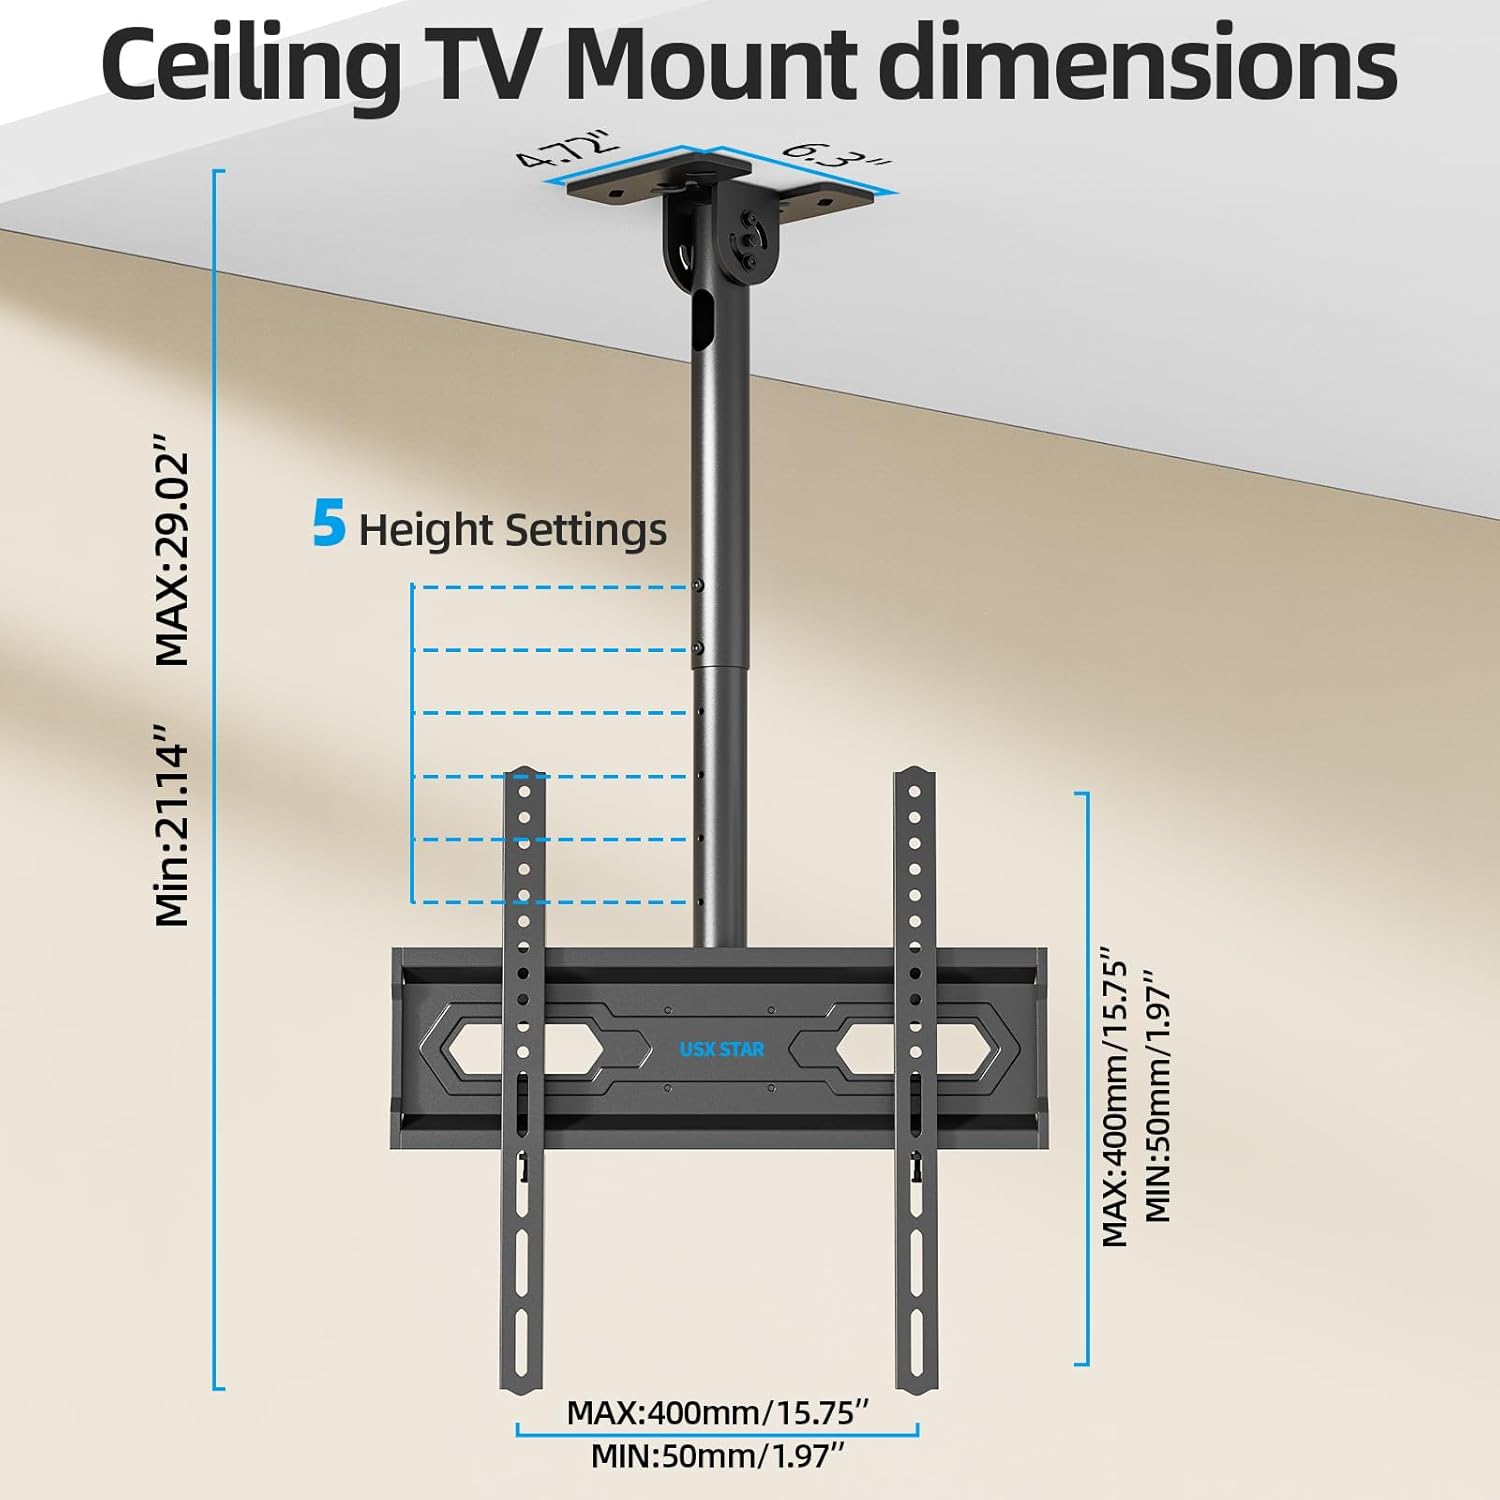
Image: Wide Compatibility Overview
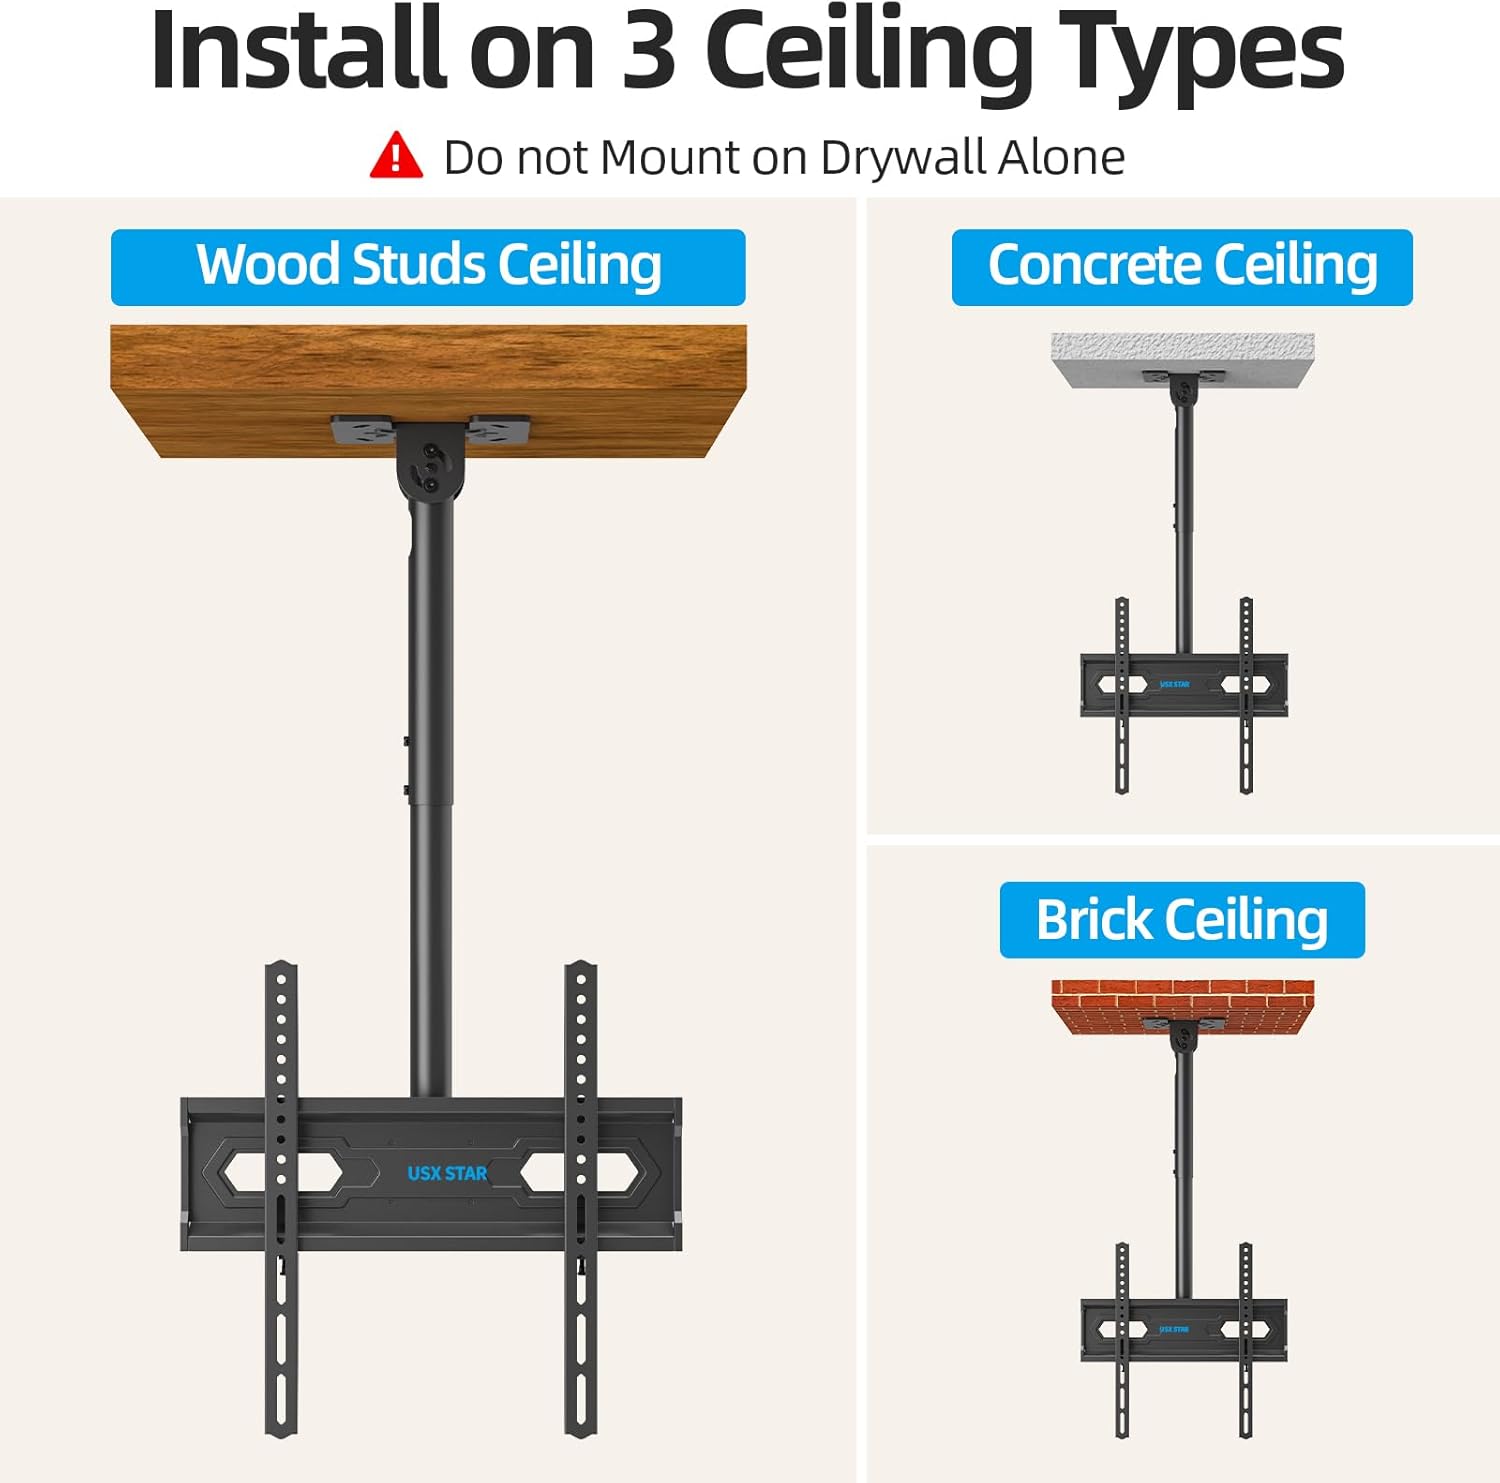
Image: Ceiling TV Mount Dimensions
5. O'rnatish va o'rnatish
5.1 O'rnatishdan oldin nazorat ro'yxati
- Verify your TV's screen size (26-65 inches), weight (under 110 lbs), and VESA mounting pattern (50x50mm to 400x400mm).
- Identify your ceiling type: wood studs, concrete, or brick. Do not install on drywall alone.
- Gather necessary tools: drill, stud finder (for wood studs), level, screwdriver, pencil, measuring tape.
5.2 Mounting the Ceiling Plate
- Determine the desired location for your TV mount. Use a stud finder to locate wood studs if applicable.
- Position the ceiling plate against the ceiling and mark the drill holes. Ensure it is level.
- Drill pilot holes according to the marked positions and your ceiling type (wood, concrete, or brick).
- Secure the ceiling plate using the appropriate screws and anchors from the hardware kit. Ensure it is firmly attached.
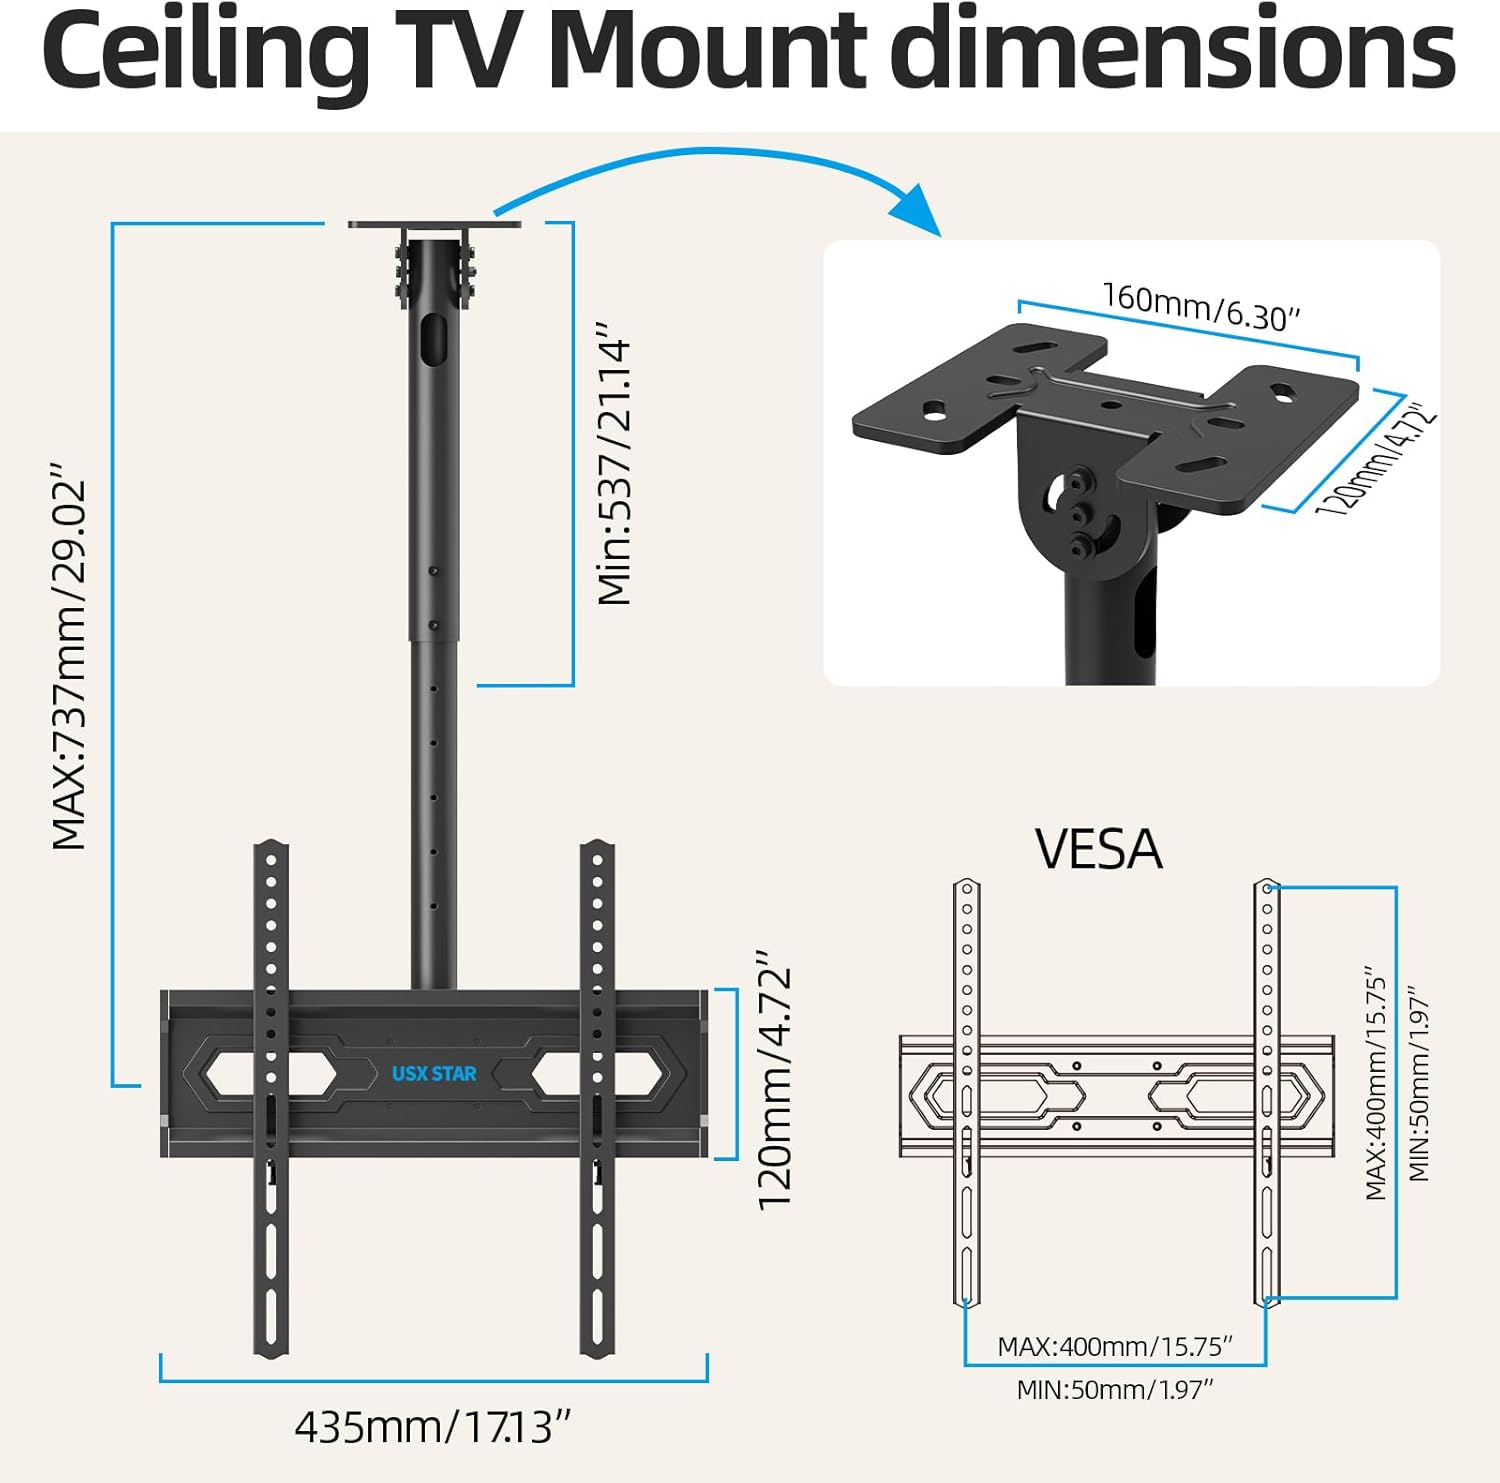
Image: Installation on Various Ceiling Types
5.3 Televizor qavslarini ulash
- Chizilishlarning oldini olish uchun televizoringizni yumshoq, toza yuzaga yuzini pastga qaratib qo'ying.
- Attach the two vertical TV brackets to the back of your television using the appropriate screws, washers, and spacers from the hardware kit. Ensure the brackets are centered and securely fastened to the TV's VESA holes.
5.4 Televizorni osib qo'yish
- With assistance, carefully lift the television and hook the vertical TV brackets onto the TV bracket plate of the ceiling mount.
- Secure the TV to the mount by tightening the safety screws or locking mechanisms on the vertical brackets.
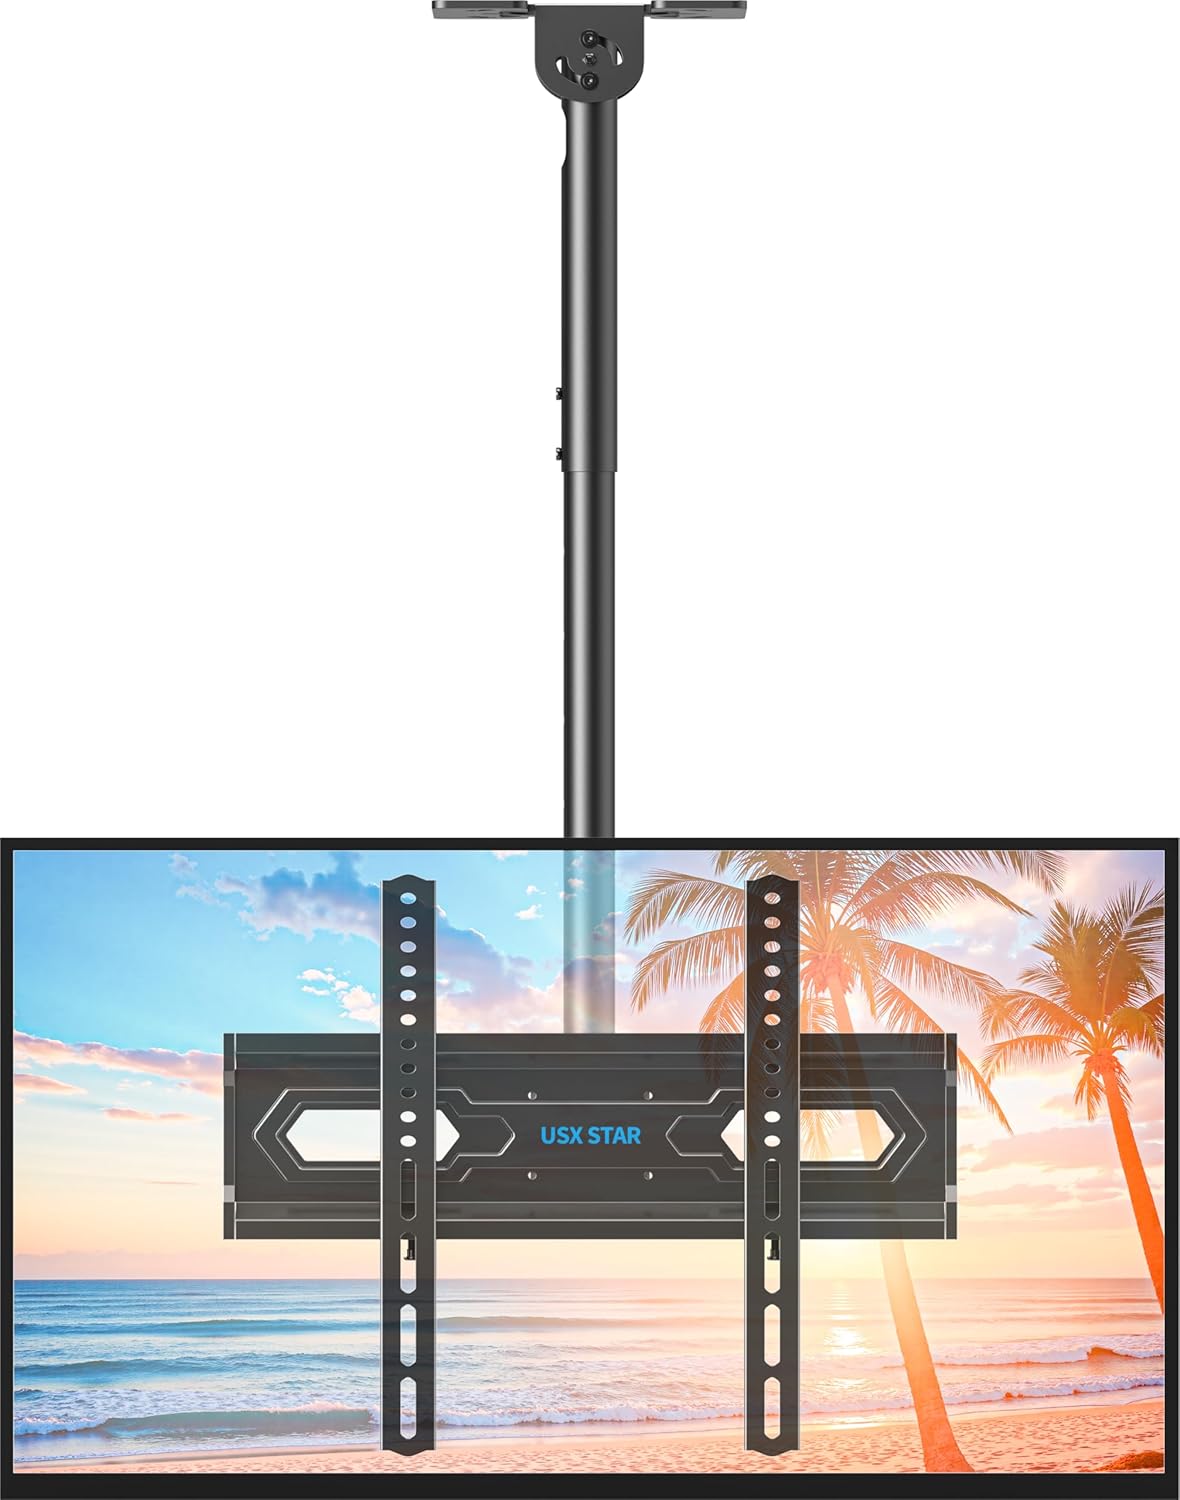
Image: Assembled Ceiling TV Mount with Television
6. Foydalanish va sozlashlar
The USX STAR SAS202 mount offers multiple adjustment options for optimal viewing.
6.1 Balandlikni sozlash
- The mount features 5 height settings, allowing adjustment from 21.14 inches to 29.02 inches.
- To adjust the height, loosen the locking mechanism on the pole, slide the TV to the desired height, and re-tighten securely.
6.2 Nishabni sozlash
- The TV can be tilted down by up to 15 degrees to reduce glare and achieve a comfortable viewkirish burchagi.
- Use the provided Allen key to loosen the tilt adjustment screws, set the desired tilt, and then re-tighten the screws firmly.
6.3 Swivel and Rotation
- The mount allows for a full 360-degree rotation of the TV, enabling viewxonadagi turli pozitsiyalardan turib.
- Additionally, the base of the mount can swivel up to 90 degrees, making it suitable for installation on angled or sloped ceilings.
- To adjust swivel, loosen the handle on the mount, rotate the TV to the desired angle, and re-tighten the handle.
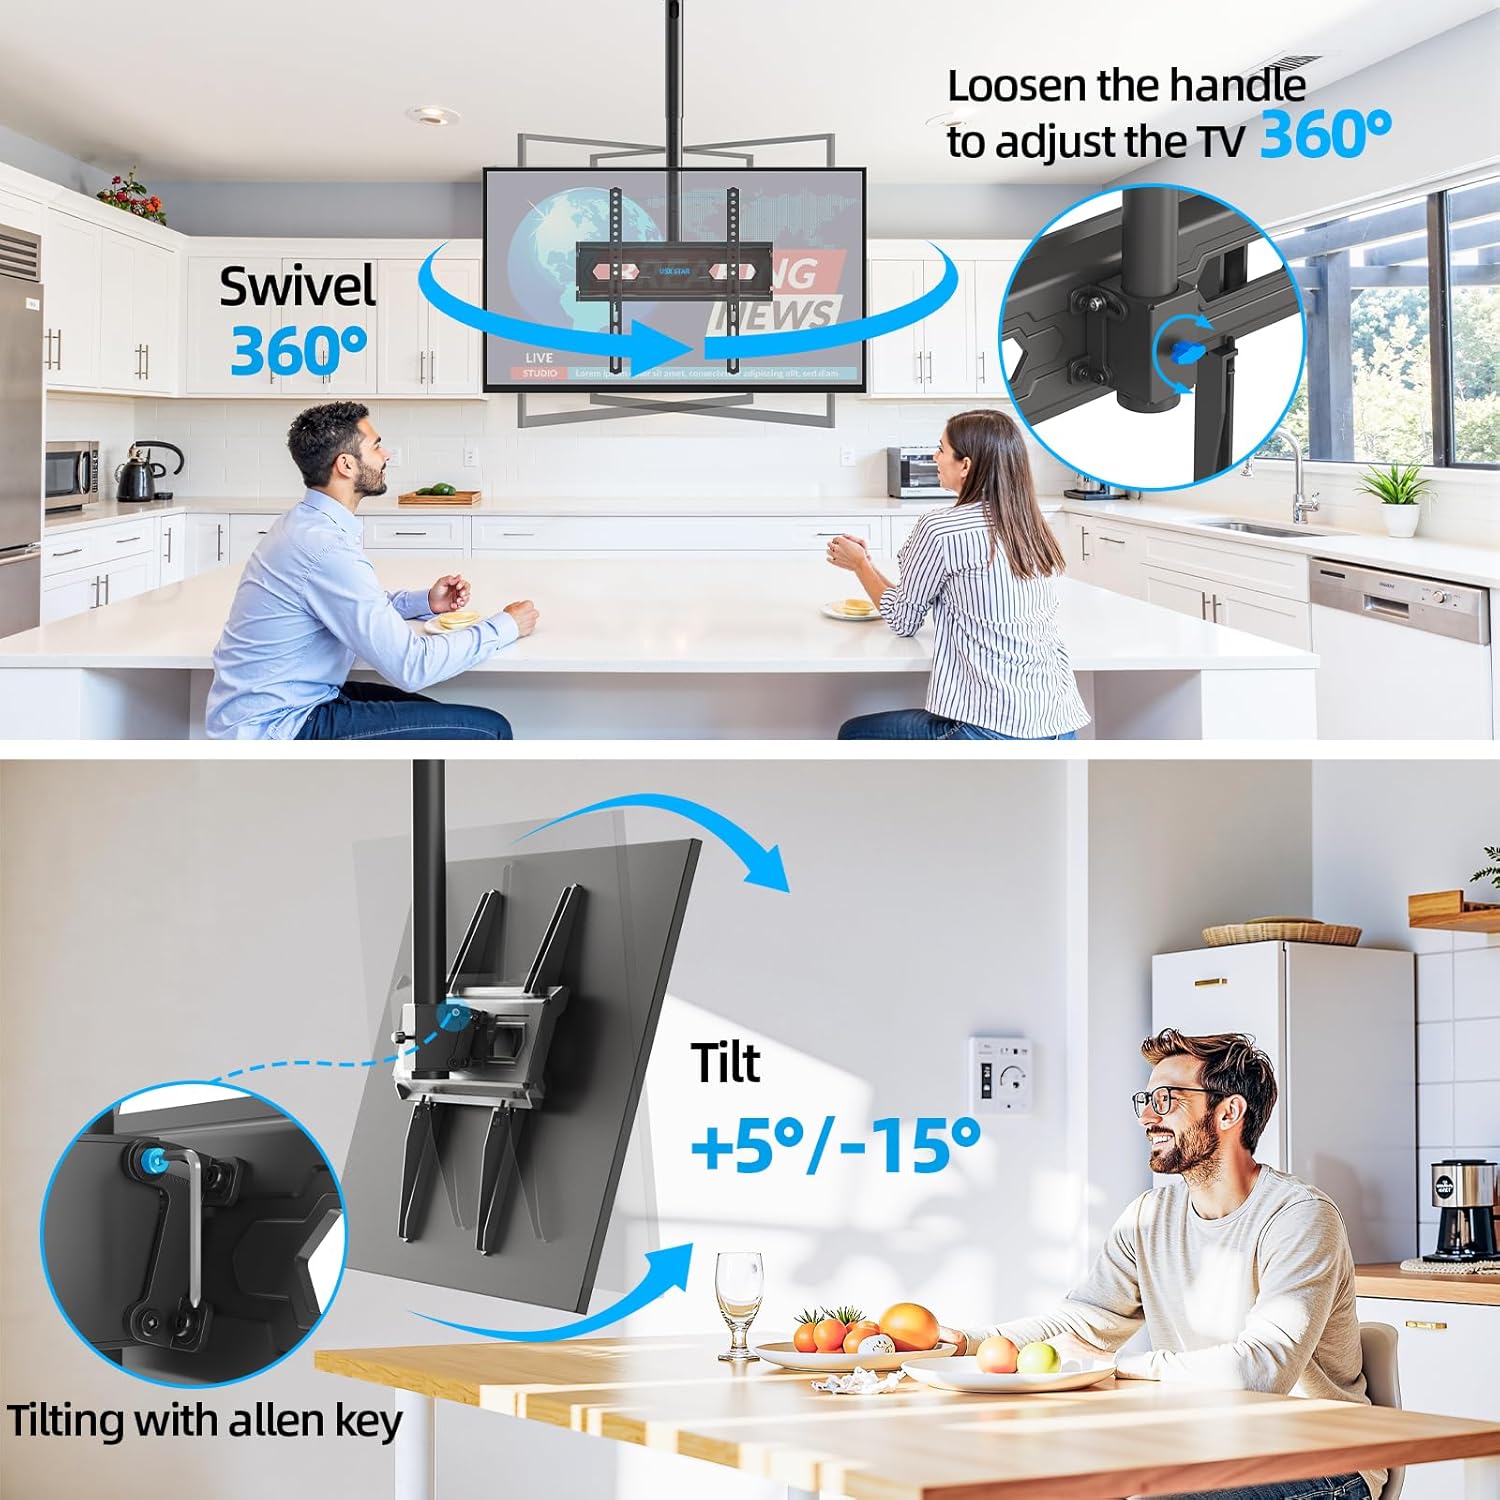
Image: Swivel and Tilt Adjustments

Image: Leveling and Sloped Ceiling Adaptability
7. Xizmat ko'rsatish
- Vaqti-vaqti bilan barcha vintlardek va ulanishlarni tekshiring, ular mahkam va ishonchli bo'lib qoladi.
- O'rnatish moslamasini yumshoq, quruq mato bilan tozalang. Abraziv tozalagichlar yoki erituvchilardan saqlaning.
- Ensure cables are properly managed through the cable management holes to prevent strain or damage.
8. Muammolarni bartaraf qilish; nosozliklarni TUZATISH
- Televizor tekis emas: Check the leveling screws on the TV bracket plate and adjust as needed. Ensure the ceiling plate was installed level.
- Tog' bo'shashgandek tuyuladi: Re-check all mounting screws on the ceiling plate and TV brackets. Ensure they are tightened securely. Do not overtighten.
- Nishabni/aylanishni sozlashdagi qiyinchilik: Loosen the adjustment screws/handles slightly before attempting to move the TV, then re-tighten once the desired position is achieved.
9. Kafolat va qo'llab-quvvatlash
USX STAR products are backed by a warranty. For specific warranty details, product support, or assistance with installation, please refer to the warranty card included with your product or visit the official USX STAR website. Our US-based customer service team is available to provide quick responses and support tailored to your needs.
Thank you for choosing USX STAR.