
Wellspeed DC1154-8B/72
Wellspeed 72 Inch Ceiling Fan with Lights and Remote
Model: DC1154-8B/72 - Instruction Manual
Xavfsizlik bo'yicha muhim ma'lumotlar
Read all instructions carefully before beginning installation. Failure to follow these instructions could result in electric shock, fire, or serious personal injury. Ensure all wiring is in accordance with national and local electrical codes.
- O'rnatish yoki xizmat ko'rsatishdan oldin elektron to'xtatuvchidagi elektrni uzing.
- Barcha elektr ulanishlari malakali elektrchi tomonidan amalga oshirilishi kerak.
- O'rnatish konstruktsiyasi ventilatorning og'irligini (taxminan 27.7 funt) ko'tara olishi kerak.
- Ventilyatorni shikastlangan pichoqlar bilan ishlatmang.
- Ensure proper clearance between fan blades and any obstacles.
Paket tarkibi
Verify that all components are present before beginning assembly. If any parts are missing or damaged, contact Wellspped customer service.

Rasm: tugadiview of all included components, including fan motor, blades, downrods, remote control, and hardware.
- Ventilatorlar motorini yig'ish
- Fan pichoqlari (8x)
- Blade Brackets (8x)
- Downrods (6-inch, 12-inch, 24-inch options)
- Soyabon va o'rnatish qavsi
- LED yorug'lik to'plami
- Devorga o'rnatish bilan masofadan boshqarish pulti
- Uskunalar to'plami (vintlar, yuvgichlar, simli yong'oqlar)
- Qo'llanma
O'rnatish va o'rnatish
Follow these steps for proper assembly and installation of your Wellspped ceiling fan. A detailed installation video is available for visual guidance.
1. Pichoqni yig'ish
- Attach each fan blade to a blade bracket using the provided screws and washers. Ensure screws are tightened securely.
- Attach the assembled blade and bracket to the fan motor housing. Repeat for all 8 blades.

Image: Assembly of fan blade to its mounting bracket.

Image: Securing a fan blade assembly to the motor unit.
2. LED Light Kit Installation
- Connect the LED light panel wires to the corresponding wires from the fan motor.
- Secure the LED light panel to the bottom of the fan motor housing with screws.
- Attach the light diffuser cover by twisting it into place.
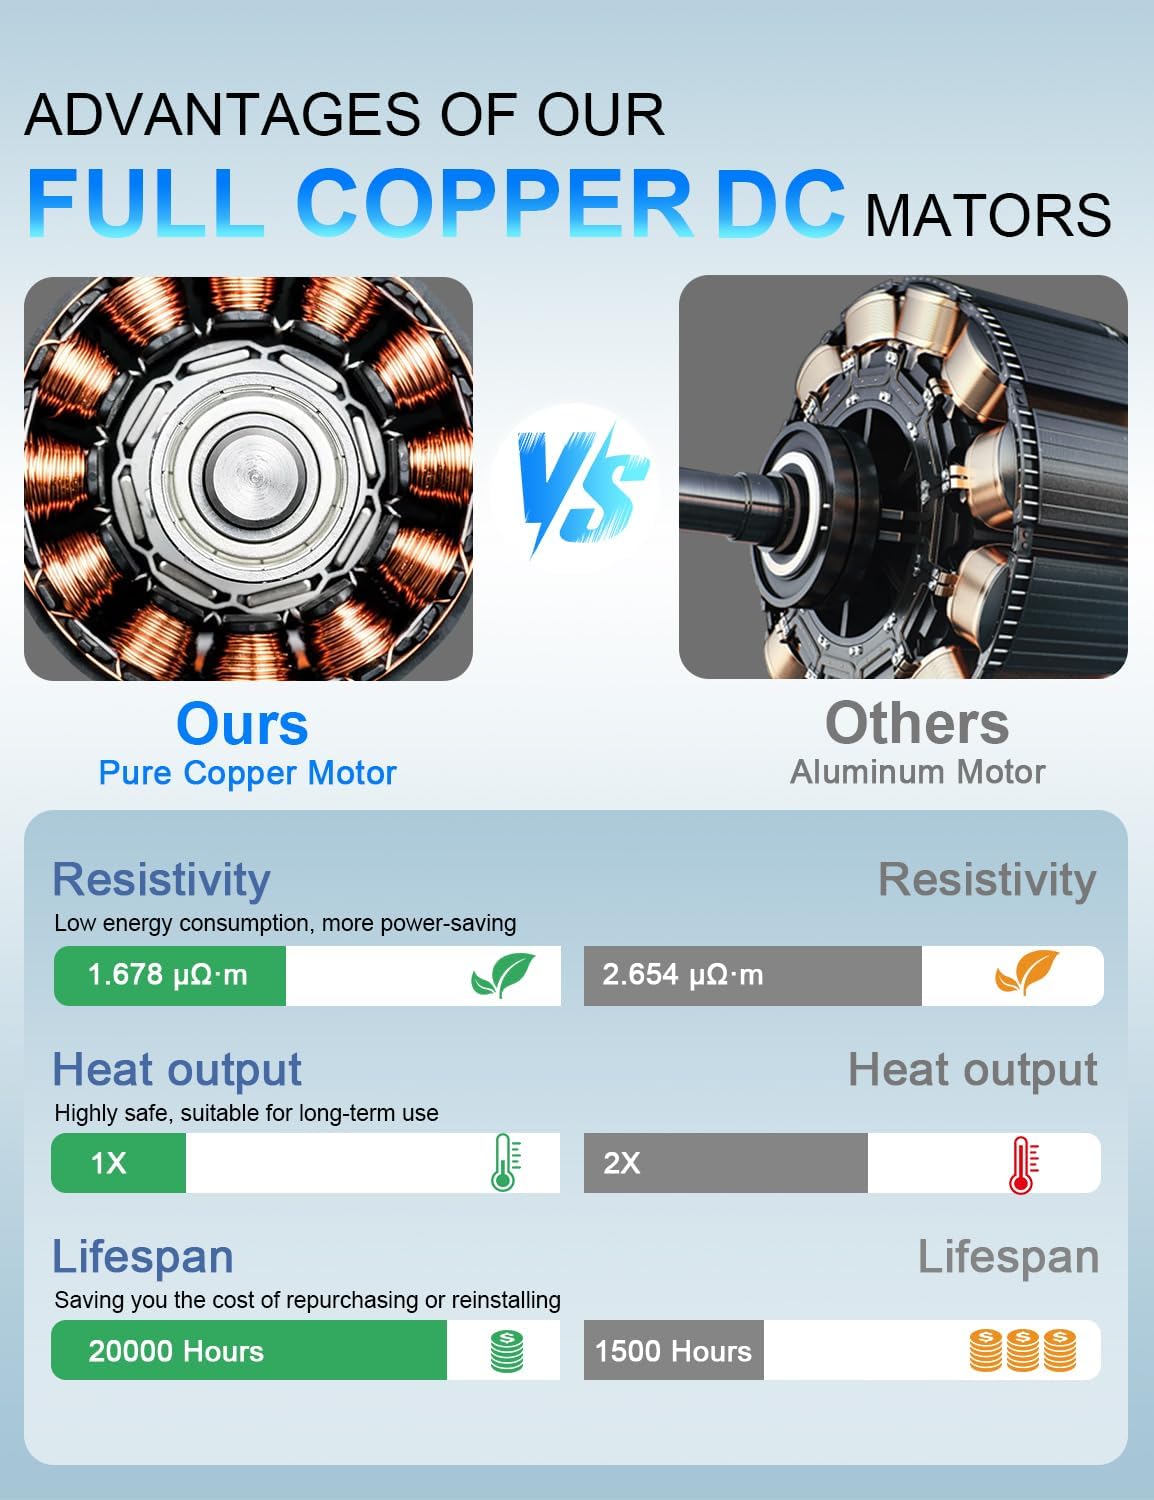
Image: Installation of the LED light panel and diffuser.
3. Downrod and Canopy Assembly
- Select the appropriate downrod length (6, 12, or 24 inches) for your ceiling height.
- Thread the fan wires and safety cable through the chosen downrod.
- Secure the downrod to the fan motor assembly using the provided pin and screws.
- Slide the canopy over the downrod.

Image: Downrod options and ceiling mounting types.
4. O'rnatish va simlarni ulash
- Install the mounting bracket to your ceiling junction box. Ensure it is securely fastened to a structural beam.
- Ventilyator yig'masini o'rnatish kronshteyniga osib qo'ying.
- Connect the electrical wires (Live, Neutral, Ground) from the fan to your household wiring using wire nuts. Connect the safety cable to the mounting bracket.
- Tuck all wires neatly into the junction box and slide the canopy up to cover the wiring and mounting bracket. Secure the canopy with screws.

Image: Electrical wiring connections for the ceiling fan.
Video: Detailed installation guide for the Wellspped large ceiling fan. This video demonstrates the unboxing, blade assembly, light kit installation, downrod attachment, and final wiring and mounting steps.
Foydalanish bo'yicha ko'rsatmalar
Your Wellspped ceiling fan is controlled by the included remote. Ensure the remote has 2 AAA batteries installed (included).
Masofadan boshqarish funksiyalari:

Image: Remote control layout and function guide.
- Ventilyatorni yoqish/o‘chirish: Fanni yoqish yoki o'chirish uchun quvvat tugmasini bosing.
- Fan tezligi (1-6): Use buttons 1-6 to select desired fan speed. 1 is the lowest, 6 is the highest.
- Chiroqni yoqish/o‘chirish: Press the light bulb button to turn the LED light on or off.
- Color Temperature (WW/NW/DW): Cycle through Warm White (3000K), Natural White (4000K), and Daylight White (6500K) settings.
- Brightness (+/-): Adjust the light brightness from 20% to 100%.
- Oldinga/teskari: Change the direction of fan rotation for summer (downward airflow) or winter (upward airflow) modes.
- Timer (1H/3H/6H): Ventilyatorni 1, 3 yoki 6 soatdan keyin avtomatik ravishda o'chiradigan qilib sozlang.
Airflow Modes:

Image: Summer and Winter airflow modes explained.
- Yozgi rejim (pastga havo oqimi): Blades rotate counter-clockwise, pushing cool air down. Ideal for cooling.
- Qish rejimi (yuqoriga havo oqimi): Blades rotate clockwise, drawing cool air up and circulating warm air down the walls. Ideal for distributing heat.
Xizmat
Muntazam texnik xizmat ko'rsatish ship foniyingizning optimal ishlashi va uzoq umr ko'rishini ta'minlaydi.
- Tozalash: Yumshoqdan foydalaning, damp Ventilyator pichoqlari va motor korpusini tozalash uchun matodan foydalaning. Abraziv tozalagichlar yoki erituvchilardan foydalanmang.
- Pichoqning qattiqligi: Periodically check all blade screws for tightness. Loose screws can cause noise and wobble.
- Nur manbai: The integrated LED light source is designed for long life. If replacement is needed, contact Wellspped customer service for compatible parts.
Muammolarni bartaraf qilish; nosozliklarni TUZATISH
| Muammo | Mumkin sabab | Yechim |
|---|---|---|
| Fan ishga tushmaydi | No power to the fan; loose wiring; remote control issue. | Check circuit breaker. Ensure all wire connections are secure. Replace remote batteries. |
| Muxlis qimirlayapti | Pichoq vintlari bo'shashgan; pichoqlar muvozanatsiz; o'rnatish kronshteyni bo'shashgan. | Tighten all blade screws. Ensure blades are installed correctly. Check mounting bracket for secure installation. |
| Nur ishlamaydi | Loose wire connection; LED panel failure; remote control issue. | Check light kit wiring connections. Replace remote batteries. Contact customer service if LED panel is faulty. |
| Shovqinli operatsiya | Loose screws; motor issue; blades hitting an obstruction. | Check and tighten all screws. Ensure no obstructions are near the blades. If noise persists, contact customer service. |
Texnik xususiyatlari
- Model nomi: DC1154-8B/72
- Hajmi: 72 dyuym
- Dvigatel turi: Sof mis DC motor
- Havo oqimi quvvati: 6900 kub fut/daqiqa (CFM)
- Tezliklari: 6 (Remote Controlled)
- Nur manbai: 18W LED, Dimmable (20%-100%)
- Rang harorati: 3000K (Issiq oq), 4000K (tabiiy oq), 6500K (kunduzgi oq)
- Tekshirish usuli: Masofadan boshqarish
- Ichki/tashqi makonda foydalanish: Indoor (Suitable for covered outdoor patios, avoid direct rain exposure)
- Mahsulot og'irligi: 27.7 funt
- Mahsulot o'lchamlari: 62"D x 62"W x 18.9"H (Note: 72-inch fan diameter, dimensions might refer to a specific configuration or packaging)
- Batareyalar: 2 AAA batteries required for remote (included)
Kafolat va qo'llab-quvvatlash
Wellspeed offers a comprehensive warranty for its products. If you experience a malfunction of accessories during use, such as lampshades, LED panels, or remote controls, Wellspped will replace your parts in brand new condition without any cost.
For further assistance, troubleshooting, or warranty claims, please contact Wellspped customer service. You can find contact information on the official Wellspped websayt yoki xarid platformangiz orqali.
Visit the official Wellspped Store for more information: Wellspeed Store
Ask a question about this manual
Ask about setup, troubleshooting, compatibility, parts, safety, or missing instructions. Manuals+ will review the question and use this page’s manual context to help answer it.