Kirish
Thank you for choosing the Anmytek Shoe Cabinet. This manual provides essential information for the safe and efficient assembly, operation, and maintenance of your new shoe cabinet. Please read this manual thoroughly before beginning assembly and retain it for future reference.
Xavfsizlik ma'lumotlari
To ensure safe use of your Anmytek Shoe Cabinet, please observe the following precautions:
- Always assemble the cabinet on a clean, flat, and soft surface to prevent scratches.
- Yig'ishdan oldin barcha qismlar mavjudligiga va shikastlanmaganligiga ishonch hosil qiling. Agar biron bir qism yo'q bo'lsa yoki shikastlangan bo'lsa, yig'ishni davom ettirmang.
- Use the provided anti-tipping kit to secure the cabinet to a wall. This is crucial for preventing accidental tipping, especially in households with children or pets.
- Do not overload the cabinet. Distribute weight evenly across shelves and drawers.
- Kichkina qismlarni va qadoqlash materiallarini bo'g'ilish xavfini oldini olish uchun bolalardan uzoqroq tuting.
- Barcha ulanishlar va mahkamlagichlarning mahkamlanganligiga ishonch hosil qilish uchun vaqti-vaqti bilan tekshirib turing.
Paket tarkibi
Yig'ishdan oldin, quyida sanab o'tilgan barcha komponentlar paketingizga kiritilganligini tekshiring. Agar biron bir qism etishmayotgan yoki shikastlangan bo'lsa, iltimos, mijozlarni qo'llab-quvvatlash xizmatiga murojaat qiling.
Komponentlar:
- Main Cabinet Panels (Top, Bottom, Sides, Back)
- Flip Drawers (2 sets)
- Side Cabinet Door
- Adjustable Shelves (for side cabinet)
- Top Slide Drawer
- Oyoqlar (4 dona)
- Hardware Pack (screws, dowels, cam locks, hinges, handles, anti-tipping kit)
Kerakli vositalar (shu jumladan emas):
- Fillips boshli tornavida
- Bolg'a (ixtiyoriy, dübeller uchun)
- Drill (optional, for anti-tipping kit wall anchor)
- Daraja
O'rnatish va yig'ish
Follow these step-by-step instructions for assembling your Anmytek Shoe Cabinet. It is recommended to have two people for assembly.
1-qadam: maydonni tayyorlang
Clear a spacious area and lay down a blanket or cardboard to protect the cabinet parts and your floor from scratches during assembly.
Step 2: Assemble the Base and Legs
Attach the four golden legs to the bottom panel of the cabinet using the provided screws. Ensure they are securely fastened.

Image: The fully assembled Anmytek Shoe Cabinet, highlighting its design and the golden legs.
Step 3: Construct the Main Frame
Connect the side panels to the bottom panel, then attach the back panel. Use cam locks and dowels as indicated in the detailed assembly diagram (refer to the included paper manual for specific diagrams). Ensure all connections are tight and flush.
Step 4: Install Flip Drawers and Side Cabinet
Install the mechanisms for the two flip drawers into their respective compartments. Attach the flip drawer fronts. For the side cabinet, install the hinges and attach the door. Insert the adjustable shelves into the side cabinet at your desired height.
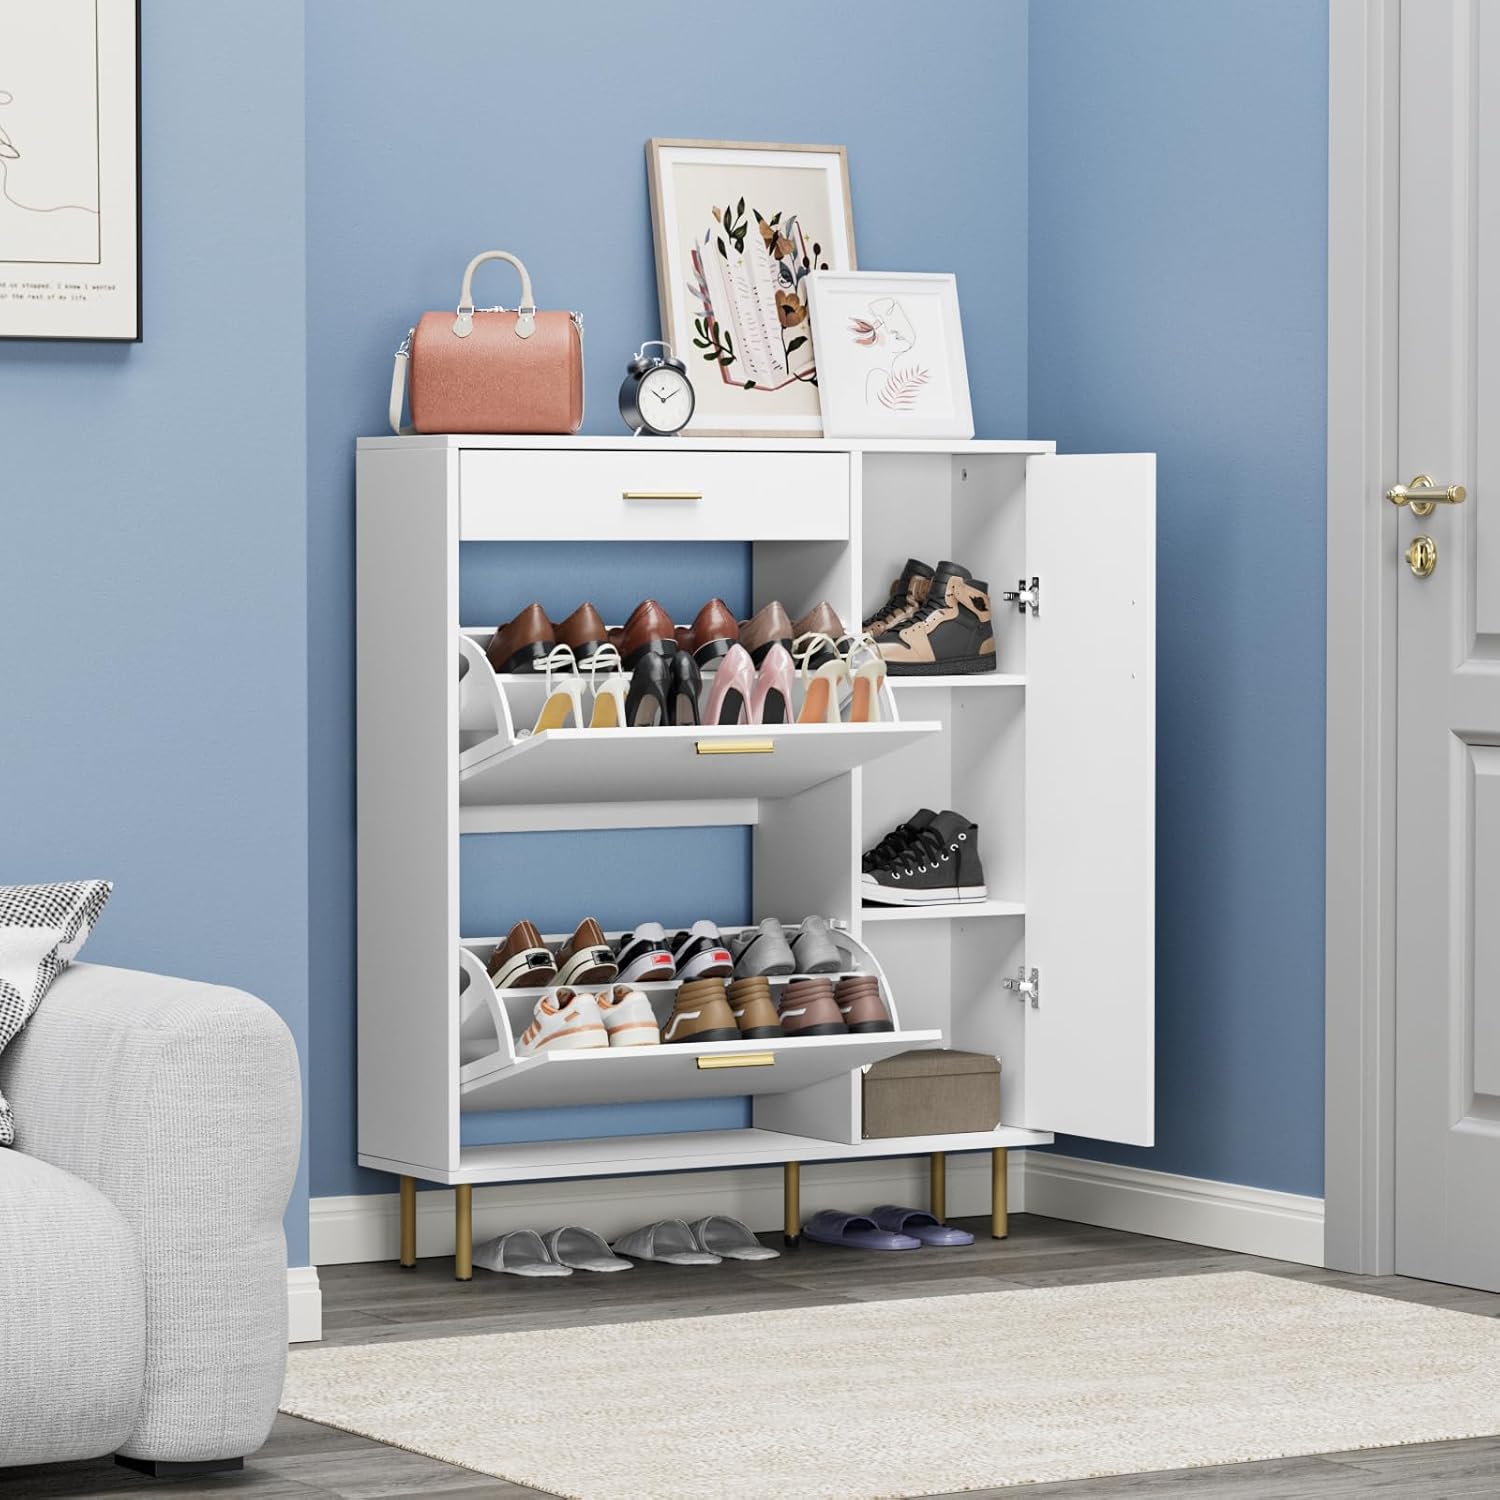
Image: The shoe cabinet with its flip drawers open, displaying shoes, and the side cabinet with its door closed. This illustrates the storage capacity and design.

Image: A detailed diagram illustrating how the panels within the flip-out drawers can be adjusted or removed, and how the shelves in the side cabinet are adjustable and removable to accommodate different shoe sizes, including boots.
Step 5: Install Top Slide Drawer
Assemble the top slide drawer and install its runners. Slide the drawer into its designated slot at the top of the cabinet.
Step 6: Attach Handles and Anti-Tipping Kit
Attach the golden handles to the flip drawers, side cabinet door, and top slide drawer. Finally, install the anti-tipping kit to secure the cabinet to a wall. This step is critical for stability and safety.

Image: The shoe cabinet positioned in an entryway, demonstrating its space-saving design and how it can store different types of footwear.
Foydalanish bo'yicha ko'rsatmalar
Using the Flip Drawers
Gently pull the handle of the flip drawer to open it. The internal mechanism will tilt the shoe racks forward, allowing easy access to your shoes. To close, push the drawer back until it clicks securely into place. The internal panels can be adjusted or removed to accommodate different shoe heights, such as sneakers, high heels, or flat shoes.
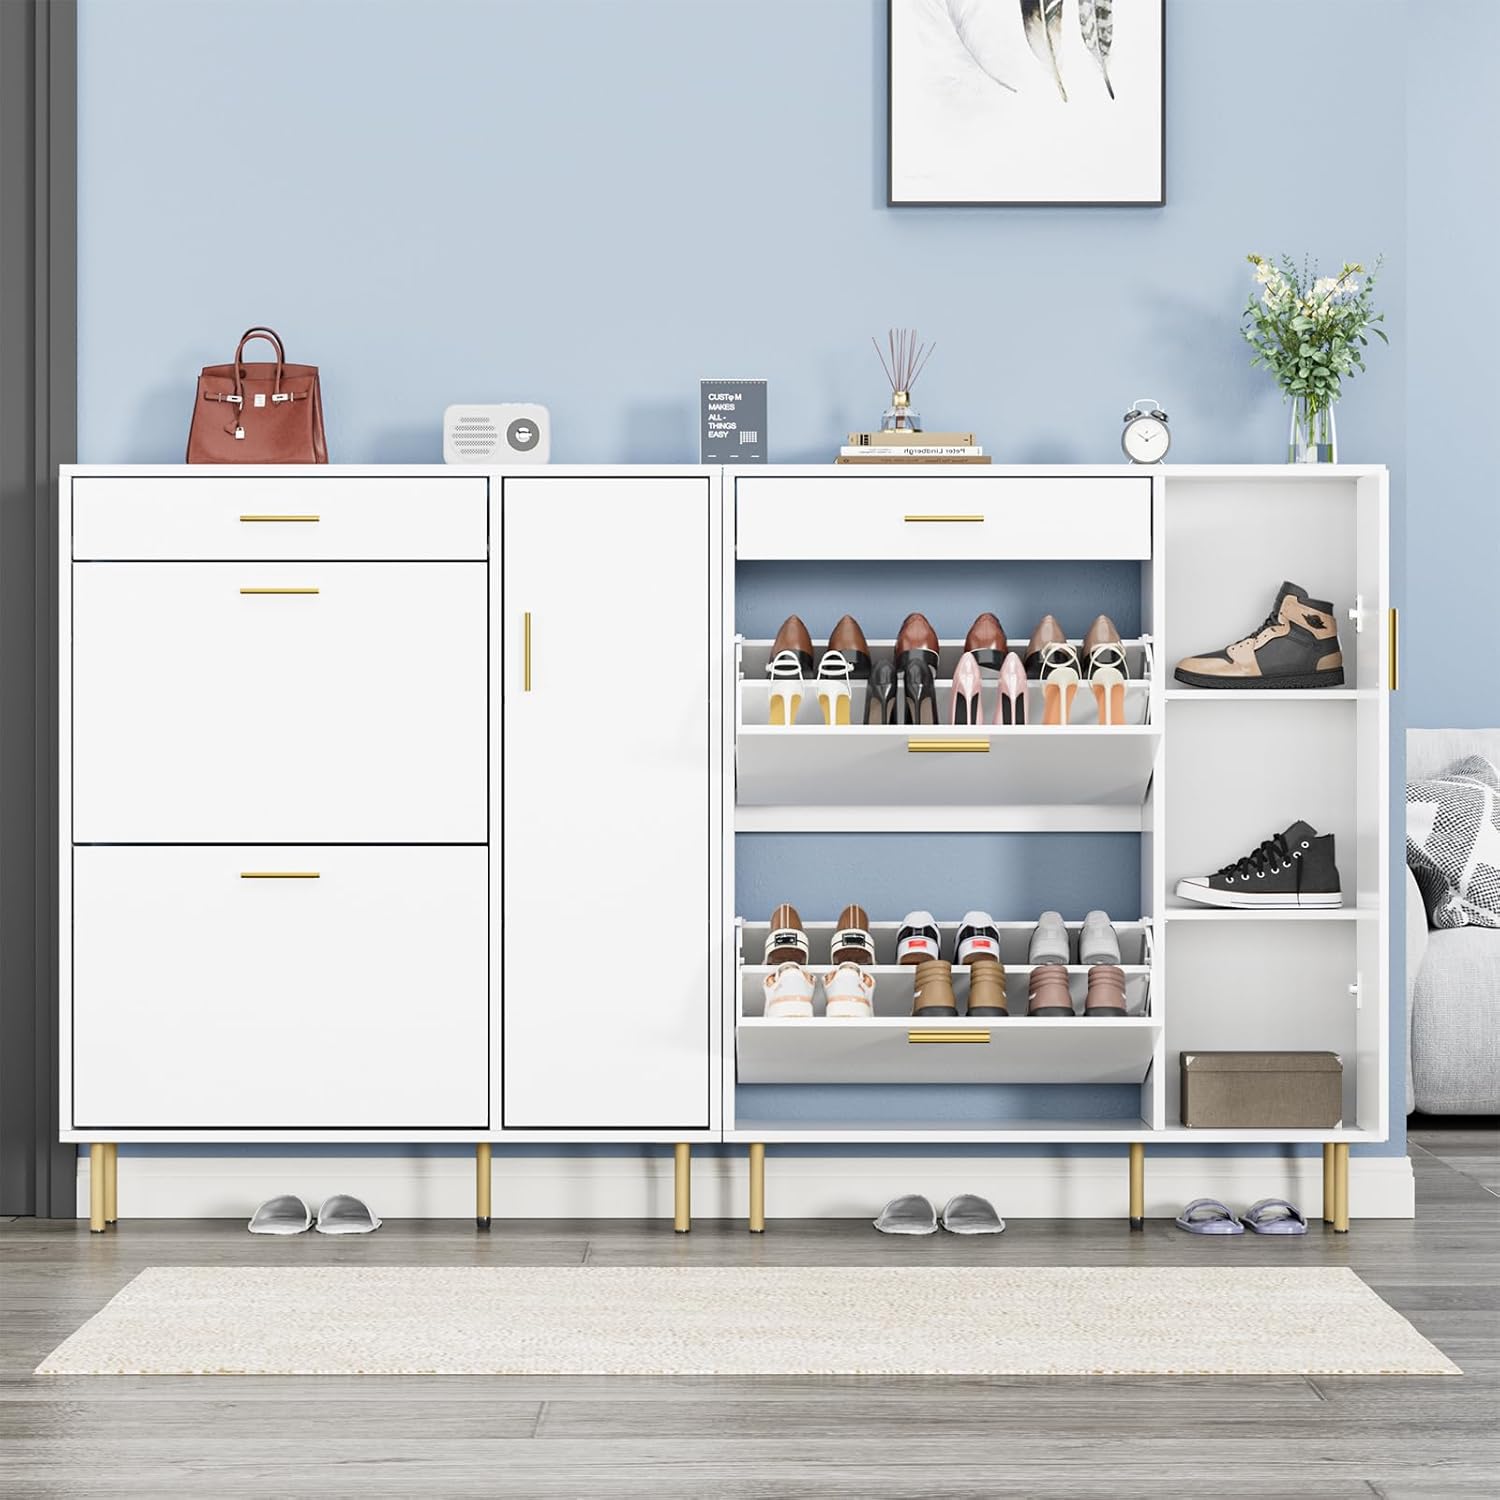
Rasm: yaqindan view of the shoe cabinet with one flip drawer open, demonstrating how shoes are organized and stored within the tilting compartments.
Using the Side Cabinet
Open the side cabinet door to access the internal shelves. These shelves are adjustable, allowing you to customize the storage space for taller items like boots or larger shoes. Simply remove and re-insert the shelf pins into the desired holes.
Using the Top Slide Drawer
The top slide drawer is ideal for storing small items such as keys, wallets, or other entryway essentials. Pull the handle to open and push to close.
Xizmat va texnik xizmat ko'rsatish
Proper care will extend the life and appearance of your Anmytek Shoe Cabinet:
- Tozalash: Yuzalarni yumshoq mato bilan artib oling, damp cloth. Avoid abrasive cleaners or harsh chemicals, as they can damage the finish.
- Changni tozalash: Muntazam ravishda quruq, yumshoq mato bilan changni artib oling.
- To'kilmalar: Yog'ochni bo'yash yoki shikastlamaslik uchun to'kilgan narsalarni darhol tozalang.
- Quyosh nuri: To'g'ridan-to'g'ri quyosh nuriga uzoq vaqt ta'sir qilishdan saqlaning, bu xiralashishi yoki rangi o'zgarishiga olib kelishi mumkin.
- Namlik: Maintain a stable humidity level in the room to prevent warping or cracking of the wood.
- Uskuna tekshiruvi: Periodically check all screws, bolts, and fasteners to ensure they are tight. Re-tighten if necessary.
Muammolarni bartaraf qilish; nosozliklarni TUZATISH
| Muammo | Mumkin sabab | Yechim |
|---|---|---|
| Shkaf tebrangan yoki beqaror. | Loose fasteners; uneven floor; anti-tipping kit not installed. | Ensure all screws and cam locks are tightened. Use a level to check the floor and place shims if necessary. Install the anti-tipping kit securely to a wall. |
| Flip drawers do not open/close smoothly. | Obstruction; misaligned mechanism; overloaded. | Check for any shoes or objects blocking the mechanism. Verify that the drawer mechanism is correctly installed and aligned. Reduce the number of shoes if overloaded. |
| Side cabinet door is misaligned. | Menteşalar bo'sh yoki noto'g'ri sozlangan. | Adjust the screws on the hinges to realign the door. Refer to the hinge adjustment instructions in the assembly manual. |
| Yig'ish paytida etishmayotgan qismlar. | Qadoqlash xatosi. | Do not proceed with assembly. Contact Anmytek customer support immediately with your purchase details and the list of missing parts. |
Mahsulot spetsifikatsiyalari
- Brend: Anmytek
- Model: H0153
- Rang: Oq
- Mahsulot o'lchamlari: 9.4"D x 35.4"W x 41.3"Y (24cm D x 90cm W x 105cm H)
- Material: Muhandislik yog'och
- Maxsus xususiyatlar: Space Saving, Anti-Tipping, Adjustable Shelf
- O'rnatish turi: Qavat tog'i
- Xona turi: Entryway, Living Room, Hallway
- Raflar soni: 4 (adjustable in side cabinet) + 2 flip drawers (multiple compartments)
- Mahsulot og'irligi: 52.8 funt (24 kilogramm)
- Yig'ish talab qilinadi: Ha
- Imkoniyat: Stores up to 15-20 pairs of shoes (varies by shoe size and style)

Image: A detailed diagram showing the dimensions of the Anmytek Shoe Cabinet, including height, width, and depth, along with internal measurements for various compartments.
Kafolat va qo'llab-quvvatlash
Anmytek stands behind the quality of its products. For any issues regarding defective products, missing parts, or general inquiries, please contact our customer support team.
Qo‘llab-quvvatlash xizmatiga murojaat qiling: If you encounter any problems, please click "Contact Seller" on the platform where you purchased the product to receive a satisfactory solution. Please have your order number and product model (H0153) ready when contacting support.
While specific warranty terms are not detailed in this manual, Anmytek is committed to providing prompt assistance for product-related concerns.


