1. Kirish
The Janome HD1400 Heavy Duty Sewing Machine is engineered for durability and ease of use, providing a reliable sewing experience for a wide range of fabrics and projects. Its robust aluminum body construction ensures stability and longevity. This manual provides essential information for the proper setup, operation, and maintenance of your machine.
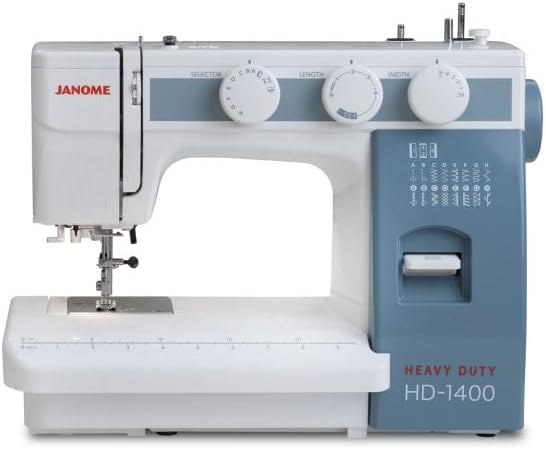
Figure 1: The Janome HD1400 Heavy Duty Sewing Machine, featuring its white and blue-gray casing, stitch selection dials, and integrated work light.
2. Xavfsizlik bo'yicha muhim ko'rsatmalar
Elektr jihozlaridan foydalanganda har doim asosiy xavfsizlik choralariga rioya qilish kerak, jumladan quyidagilar:
- Ushbu tikuv mashinasini ishlatishdan oldin barcha ko'rsatmalarni o'qing.
- Keep these instructions in a suitable place near the machine.
- Unplug the machine from the electrical outlet immediately after using and before cleaning, removing covers, or making any user servicing adjustments.
- Do not allow to be used as a toy. Close attention is necessary when this machine is used by or near children.
- Ushbu jihozdan faqat ushbu qo'llanmada ta'riflanganidek foydalanish uchun foydalaning.
- Never operate this machine if it has a damaged cord or plug, if it is not working properly, or if it has been dropped or damaged.
- Hech qachon biron-bir ob'ektni biron bir teshikka tushirmang yoki kiritmang.
- Ochiq havoda foydalanmang.
- Aerozol (purkagich) mahsulotlari ishlatilayotgan yoki kislorod yuborilayotgan joyda ishlamang.
- O'chirish uchun barcha boshqaruv elementlarini o'chirilgan holatga aylantiring, so'ngra vilkasini rozetkadan chiqarib oling.
3. Machine Components
Familiarize yourself with the main parts of your Janome HD1400 sewing machine to ensure correct operation.
- Spool Pins: Holds the thread spool.
- Thread Guide: Guides the thread during winding and sewing.
- Tension dial: Adjusts the upper thread tension.
- Stitch Selector Dial: Selects the desired stitch pattern (16 options).
- Stitch Length Dial: Adjusts the length of the stitches.
- Stitch Width Dial: Adjusts the width of zigzag and decorative stitches.
- Reverse Stitch Lever: Engages reverse sewing for securing stitches.
- Igna: Pierces the fabric to form stitches.
- Bosuvchi oyoq: Holds the fabric firmly against the feed dogs.
- Bobbin Winder: Winds thread onto the bobbin.
- Qo'l g'ildiragi: Manually raises and lowers the needle.
- Quvvat tugmasi: Turns the machine on/off and controls the light.
- Foot Control Jack: Connects the foot control for speed regulation.
- Built-in Needle Threader: Assists in threading the needle.
- Drop Feed Dog Lever: Lowers the feed dogs for free-motion sewing.
4. Dastlabki sozlash
4.1 Qadoqdan chiqarish va joylashtirish
Carefully remove the machine from its packaging. Place the machine on a stable, flat surface, ensuring adequate space for fabric handling. Keep all packing materials for future storage or transport.
4.2 Quvvatga ulanish
Insert the machine plug into the machine's power socket. Connect the foot control plug to the foot control jack. Plug the power cord into a suitable electrical outlet (AC power source).
4.3 Bobbin Winding
- Bobinni o'rash miliga bo'sh g'altakni joylashtiring.
- G'altakning piniga ipli g'altakni joylashtiring.
- Ipni ustki ip yo'riqnomasi orqali va g'altakni o'rash taranglik diskining atrofiga o'tkazing.
- Wrap the thread clockwise around the bobbin a few times.
- Bobin o'rash milini o'ngga suring.
- Press the foot control to start winding. Stop when the bobbin is full.
- Ipni kesib oling va g'altakning o'rash milini chapga qaytaring.
4.4 Inserting the Bobbin
- G'altakning qopqog'ini oching.
- Ipning to'g'ri yo'nalishda (odatda soat miliga teskari yo'nalishda) yechilishini ta'minlab, o'ralgan g'altakni g'altak qutisiga joylashtiring.
- Pull the thread through the tension spring and into the thread guide slot.
- G'altakning qopqog'i plitasini almashtiring.
4.5 Threading the Upper Thread
- Bosim oyog'ining qo'lini ko'taring.
- G'altakning piniga ipli g'altakni joylashtiring.
- Guide the thread through the upper thread guides as indicated by the numbered path on the machine.
- Ensure the thread passes through the tension discs and into the take-up lever.
- Thread the needle from front to back, or use the built-in needle threader.
4.6 Needle Installation
- Turn the handwheel towards you to raise the needle to its highest position.
- Ignani bo'shatingamp vida.
- Remove the old needle.
- Yangi ignani yassi tomoni mashinaning orqa tomoniga qaragan holda joylashtiring va uni iloji boricha yuqoriga itaring.
- Ignani clamp ishonchli tarzda vidalang.
5. Mashinani ishlatish
5.1 Stitch Selection
ni aylantiring Tikuv tanlash tugmasi to choose one of the 16 available stitch patterns. The selected stitch will be indicated on the dial.
5.2 Adjusting Stitch Length and Width
- Tikuv uzunligi: dan foydalaning Tikuv uzunligi bo'yicha terish to adjust the length of your stitches. Higher numbers result in longer stitches.
- Tikuv kengligi: dan foydalaning Tikuv eni terish to adjust the width of zigzag and decorative stitches. Higher numbers result in wider stitches.
5.3 Sewing a Seam
- Matoingizni bosim oyog'i ostiga qo'ying.
- Bosuvchi oyoq qo'lini pastga tushiring.
- Turn the handwheel to lower the needle into the fabric.
- Press the foot control to begin sewing. Guide the fabric gently.
- At the end of the seam, press the reverse stitch lever to secure the stitches.
- Raise the needle and presser foot, then remove the fabric.
5.4 Reverse Stitch
To sew in reverse, press and hold the Teskari tikuv dastagi while sewing. Release the lever to resume forward sewing. This is used to secure the beginning and end of seams.
5.5 Buttonhole Sewing
The Janome HD1400 features a 4-step buttonhole. Refer to the stitch selector for the four buttonhole steps (1, 2, 3, 4). Use the included buttonhole foot for best results.
- Tugma oyog'ini ulang.
- Mark the buttonhole position on your fabric.
- Set the stitch selector to the first buttonhole step.
- Sew the first side of the buttonhole.
- Switch to the next step and sew the bar tack.
- Continue through all four steps, rotating the fabric as needed, to complete the buttonhole.
5.6 Drop Feed Dog
The Drop Feed Dog Lever is located on the back of the free arm. Lowering the feed dogs allows for free-motion sewing, darning, or embroidery without the fabric being fed automatically by the machine. Raise the feed dogs for normal sewing.
6. Xizmat va texnik xizmat ko'rsatish
6.1 Tozalash
Regular cleaning helps maintain your machine's performance. Always unplug the machine before cleaning.
- Bobin maydoni: Remove the bobbin case and bobbin. Use a small brush to remove lint and dust from the bobbin area and feed dogs.
- Machine Surface: Wipe the exterior of the machine with a soft, dry cloth. Do not use harsh chemicals or abrasive cleaners.
6.2 Saqlash
When not in use, cover your machine with the provided dust cover to protect it from dust and debris. Store it in a dry, stable environment.
7. Muammolarni bartaraf etish bo'yicha qo'llanma
Ushbu bo'lim siz duch kelishi mumkin bo'lgan umumiy muammolarni ko'rib chiqadi. Bu yerda ko'rsatilmagan muammolar uchun mijozlarni qo'llab-quvvatlash xizmatiga murojaat qiling.
| Muammo | Mumkin sabab | Yechim |
|---|---|---|
| Ip uzilishlari | Incorrect tension, improperly threaded, bent needle | Adjust tension, re-thread machine, replace needle |
| O'tkazilgan tikuvlar | Bent or dull needle, incorrect needle size for fabric | Replace needle, use appropriate needle type/size |
| Mato oziqlanmayapti | Presser foot not lowered, feed dogs dropped | Lower presser foot, raise feed dogs |
| Mashina ishga tushmayapti | Power cord not connected, foot control not connected, power switch off | Check all connections, turn power switch on |
8. Texnik spetsifikatsiyalar
- Model: HD1400
- Olchamlari (U x G x Y): 15 x 6.5 x 11.5 dyuym
- Mahsulot og'irligi: 17.71 funt
- Stitches: 16 ta o'rnatilgan tikuv
- Tugma teshigi: 4-qadam
- Hook System: Vertical Oscillating Hook
- Kuzov qurilishi: Og'ir alyuminiy
- Quvvat manbai: AC
- UPC: 732212411977
9. Kiritilgan aksessuarlar
Your Janome HD1400 machine comes with the following accessories:
- Bobinlar
- Igna to'plami
- Tikuvchi Ripper
- Tugma teshigi
- Hemmer oyog'i
- Fermuarli oyoq
- Hemming uchun qo'llanma
- Yog '
- Tornavida
- Chang qoplami
- Oyoqni boshqarish
- Qo'llanma (bu hujjat)
10. Kafolat va mijozlarni qo'llab-quvvatlash
For warranty information, service, or technical assistance, please refer to the warranty card included with your product or visit the official Janome websayt. Xarid kvitansiyasini xaridni tasdiqlovchi hujjat sifatida saqlang.


